
Screen Making 101: Reclaim Screen for Screen Printing
Reclaiming a screen is a basic step in the screen printing process, but learning the basics can sometimes feel overwhelming when it comes to screen printing. Equip yourself with the right screen printing products, and the right knowledge, to avoid frustration when reclaiming a screen. Check out our easy step-by-step guide on how to reclaim your screen after screen printing.
How To Remove Screen Printing Emulsion and Reclaim Your Screen
To reclaim your screen you can either use a premixed emulsion remover like Chroma/Strip iSC Stencil Remover or you can mix your own emulsion remover up to 35:1 using Chroma/Strip Plus iSC Stencil Remover Concentrate. If you have a high volume shop and use an automatic reclaim process, we recommend using Auto Strip iSC 200:1 Stencil Remover to avoid foaming issues.
STEP 1: Ink Removal
The first step to reclaiming your screen is to remove the inks. Start with a card or spatula to remove the bulk of the ink. Next, apply a light spray of Chroma/Screen Wash iSC and work it in a circular motion with a soft nylon, bristle brush. Finish with a low pressure water rinse.
STEP 2: Apply Stencil Remover
Next you will want to remove the emulsion from your screen using a stencil remover. Apply Chroma/Strip Stencil Remover to both sides of the screen.
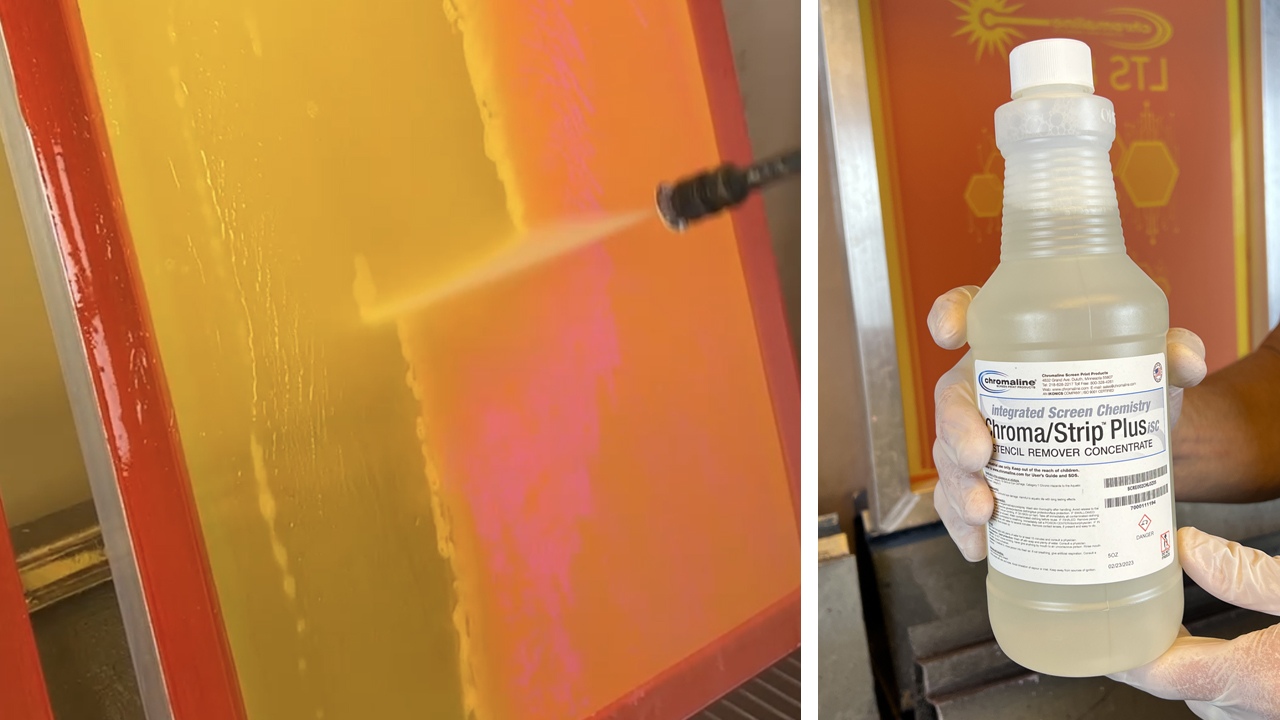
NOTE: Chromaline has reformulated the Chroma/Strip Plus concentrate as part of its line of integrated Screen Chemistry. It now includes a powerful degreaser and comes in a 35:1 concentrate. By purchasing your stencil remover in a concentrate you're buying less water, you're buying less plastic packaging, you're saving money and you're saving time. Watch the video linked below to learn more about this powerful emulsion remover concentrate.
WATCH VIDEO: Reclaim Screen with ChromaStrip Emulsion Remover Concentrate
STEP 3: Remove Emulsion
BRUSH METHOD: If you are using the brush method to remove your screen printing emulsion, you can brush right away. Scrub both sides of the screen with a brush until you can see the emulsion start to break down. Use a dedicated brush and mark it for stencil remover. We don't recommend using a scrub pad, which will start to break down and will leave little particles in your screen. Instead, we recommend a soft nylon bristle scrub with no metal on it.
DWELL METHOD: If you are using the dwell method to remove your screen printing emulsion, let the Chroma/Strip soak, or dwell, for 30-60 seconds. Pro Tip: Never let screen reclaimer dry on your screen.
STEP 4: Pressure Wash
A good pressure washer will more thoroughly remove any stubborn emulsion or ink that remains. Without the proper pressure you will have a hard time getting those residuals to wash out completely and it will affect the quality of the next coating. 1000-1500 PSI is sufficient. When using a pressure washer, always wear eye and ear protection.
STEP 5: Degrease The Mesh
We highly recommend degreasing mesh, it's added insurance that your next round of coatings will be perfect. Apply a small amount of degreaser, such as Chroma/Wet iSC or Degreaser 260 iSC, to the screen and scrub both sides in a circular motion using a soft bristle brush. Rinse with water starting at the top and without pressure (we don't want to splash that dirty water from the booth back on to the clean screen). Check out our blog post, Screen Making 101: Degrease Your Screen, for more information on the importance of degreasing.
Contact Chromaline Today
If you have any further questions about reclaiming a screen for screen printing, please contact us today.